

How to Send an Email
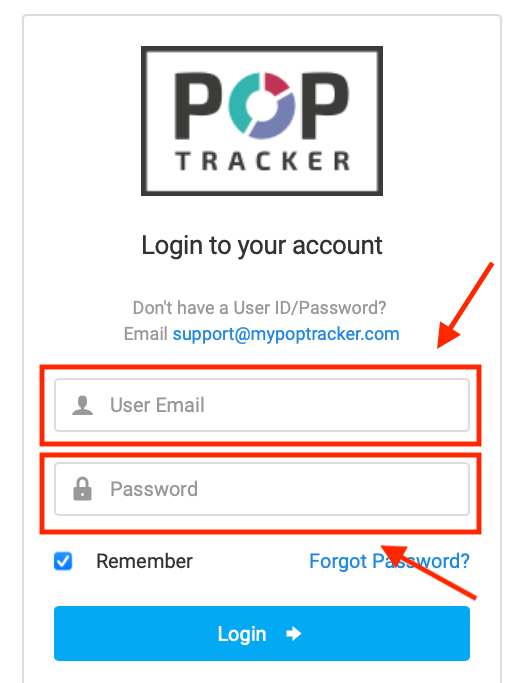
1) Login to POP Tracker Using your Personalized credentials.
2) Select the client and campaign you wish to send an email regarding.

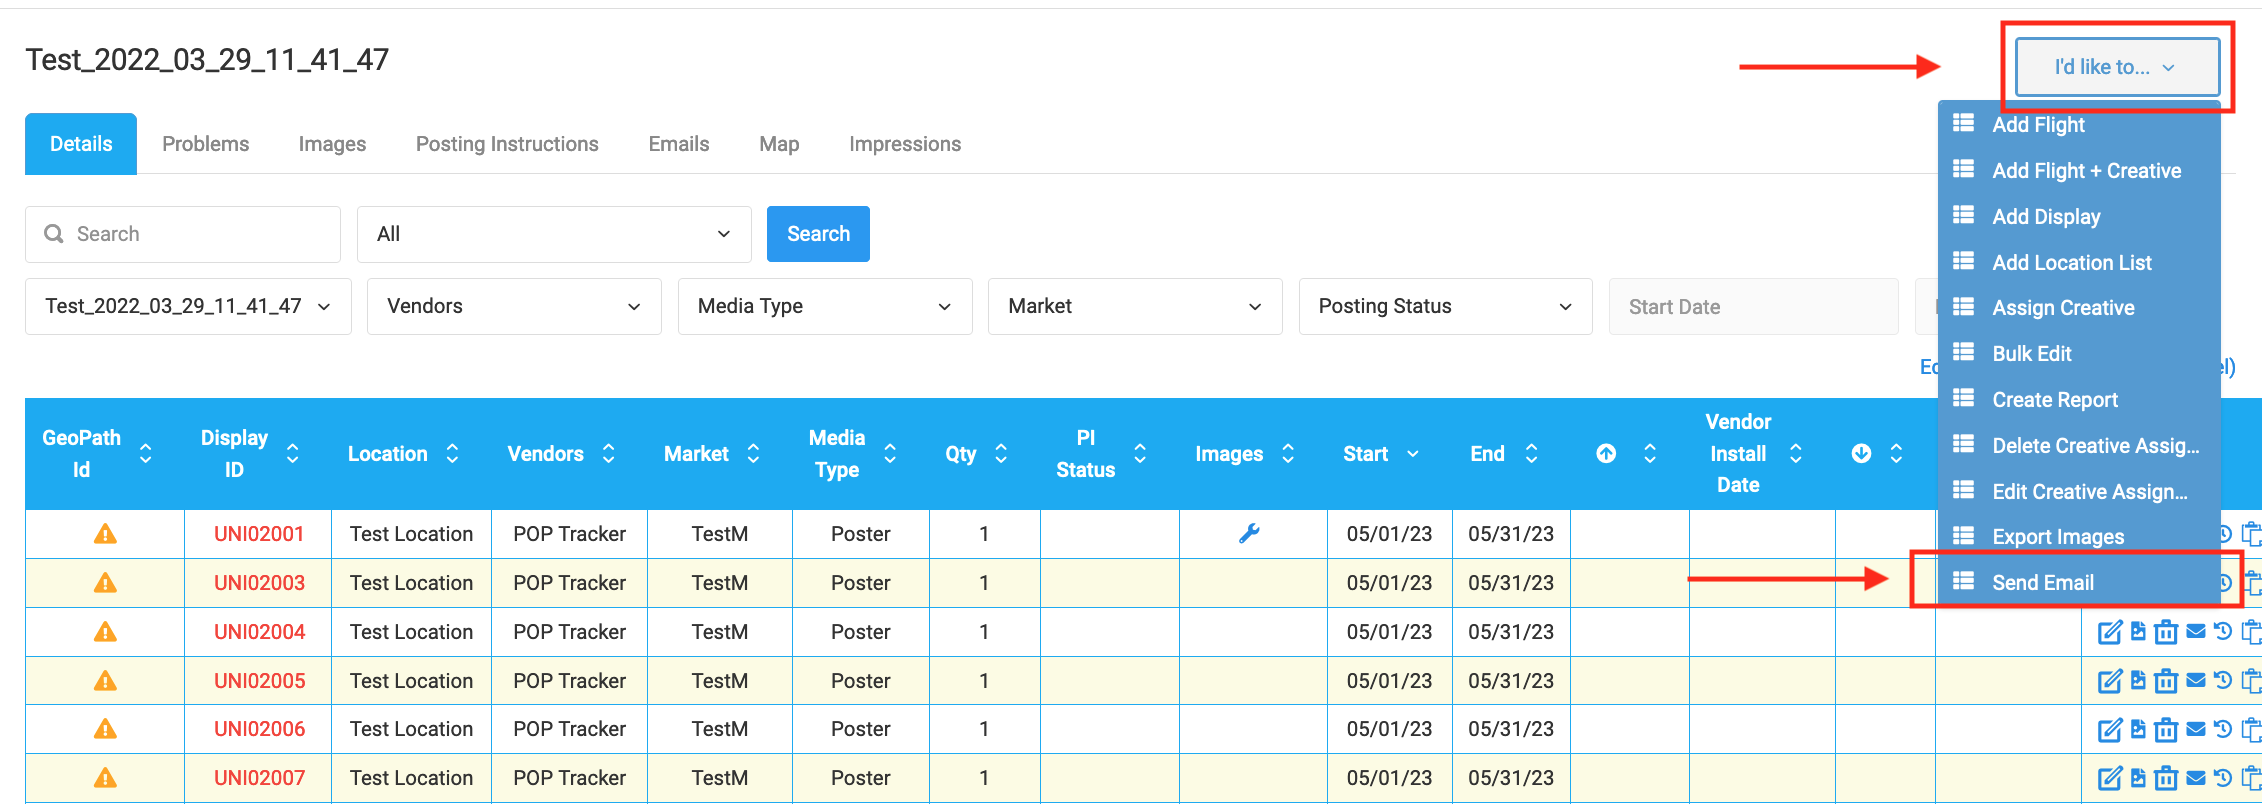
3) In the top right corner of the screen there is a tab that says "I'd like to..." which when selected, displays a drop down menu. The very last option is "Send Email" and you'll want to select it.
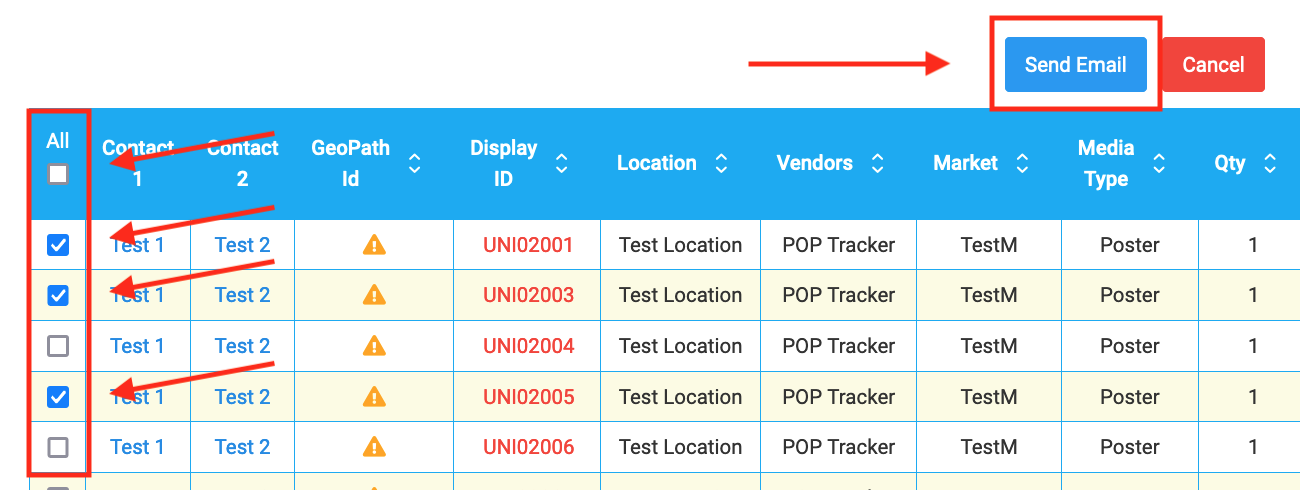
4) Next, you'll select all of the line items you wish to include in the email. If you want to send include all of them, there is a button on the left hand side of the column at the top that says "All", and you'll want to check that box. Once you have selected all the units you wish to include in the email, hit the blue "Send Email" button at the top of the table.
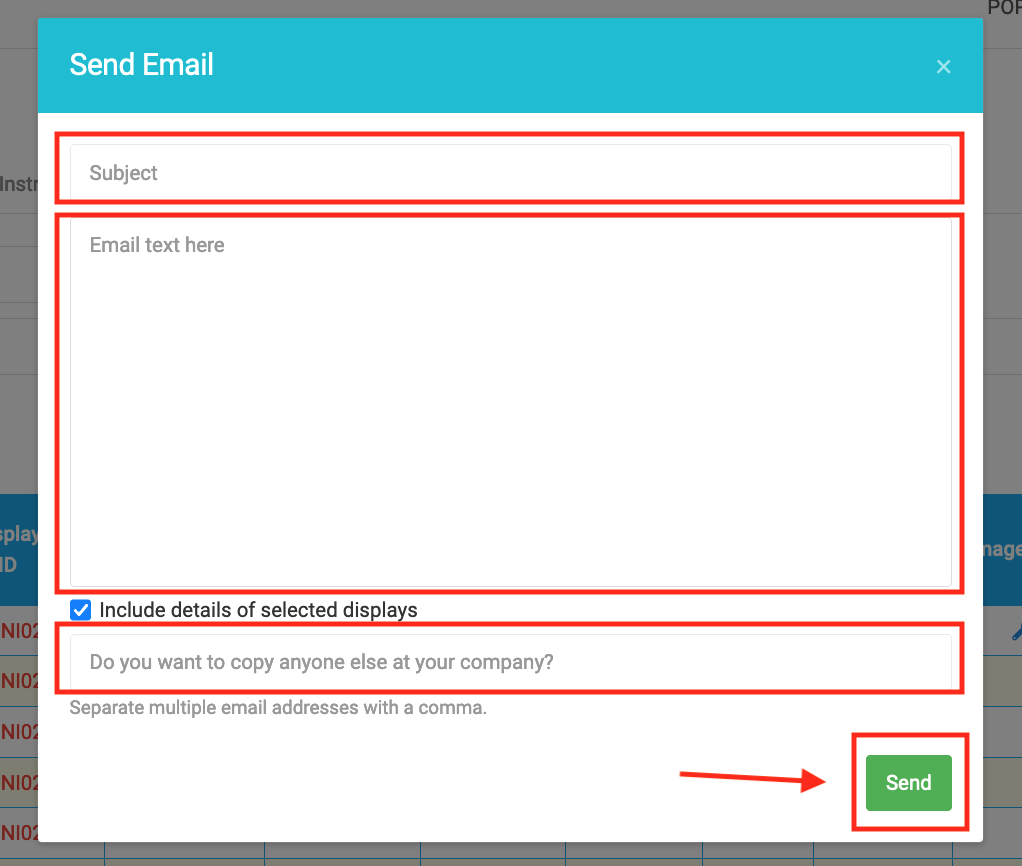
5) A pop up screen will appear with a subject line and a text box where you can fill in all the necessary information. You also have the option to copy others on the email as well. Once you hit send, you're all set! The email will send to the contact(s) assigned to the campaign. For more information on how to change the contact information on a campaign, see our other user guides or send us an email!
POP Tracker Support - support@mypoptracker.com